Showing posts with label texture paste. Show all posts

Tuesday, August 11, 2020

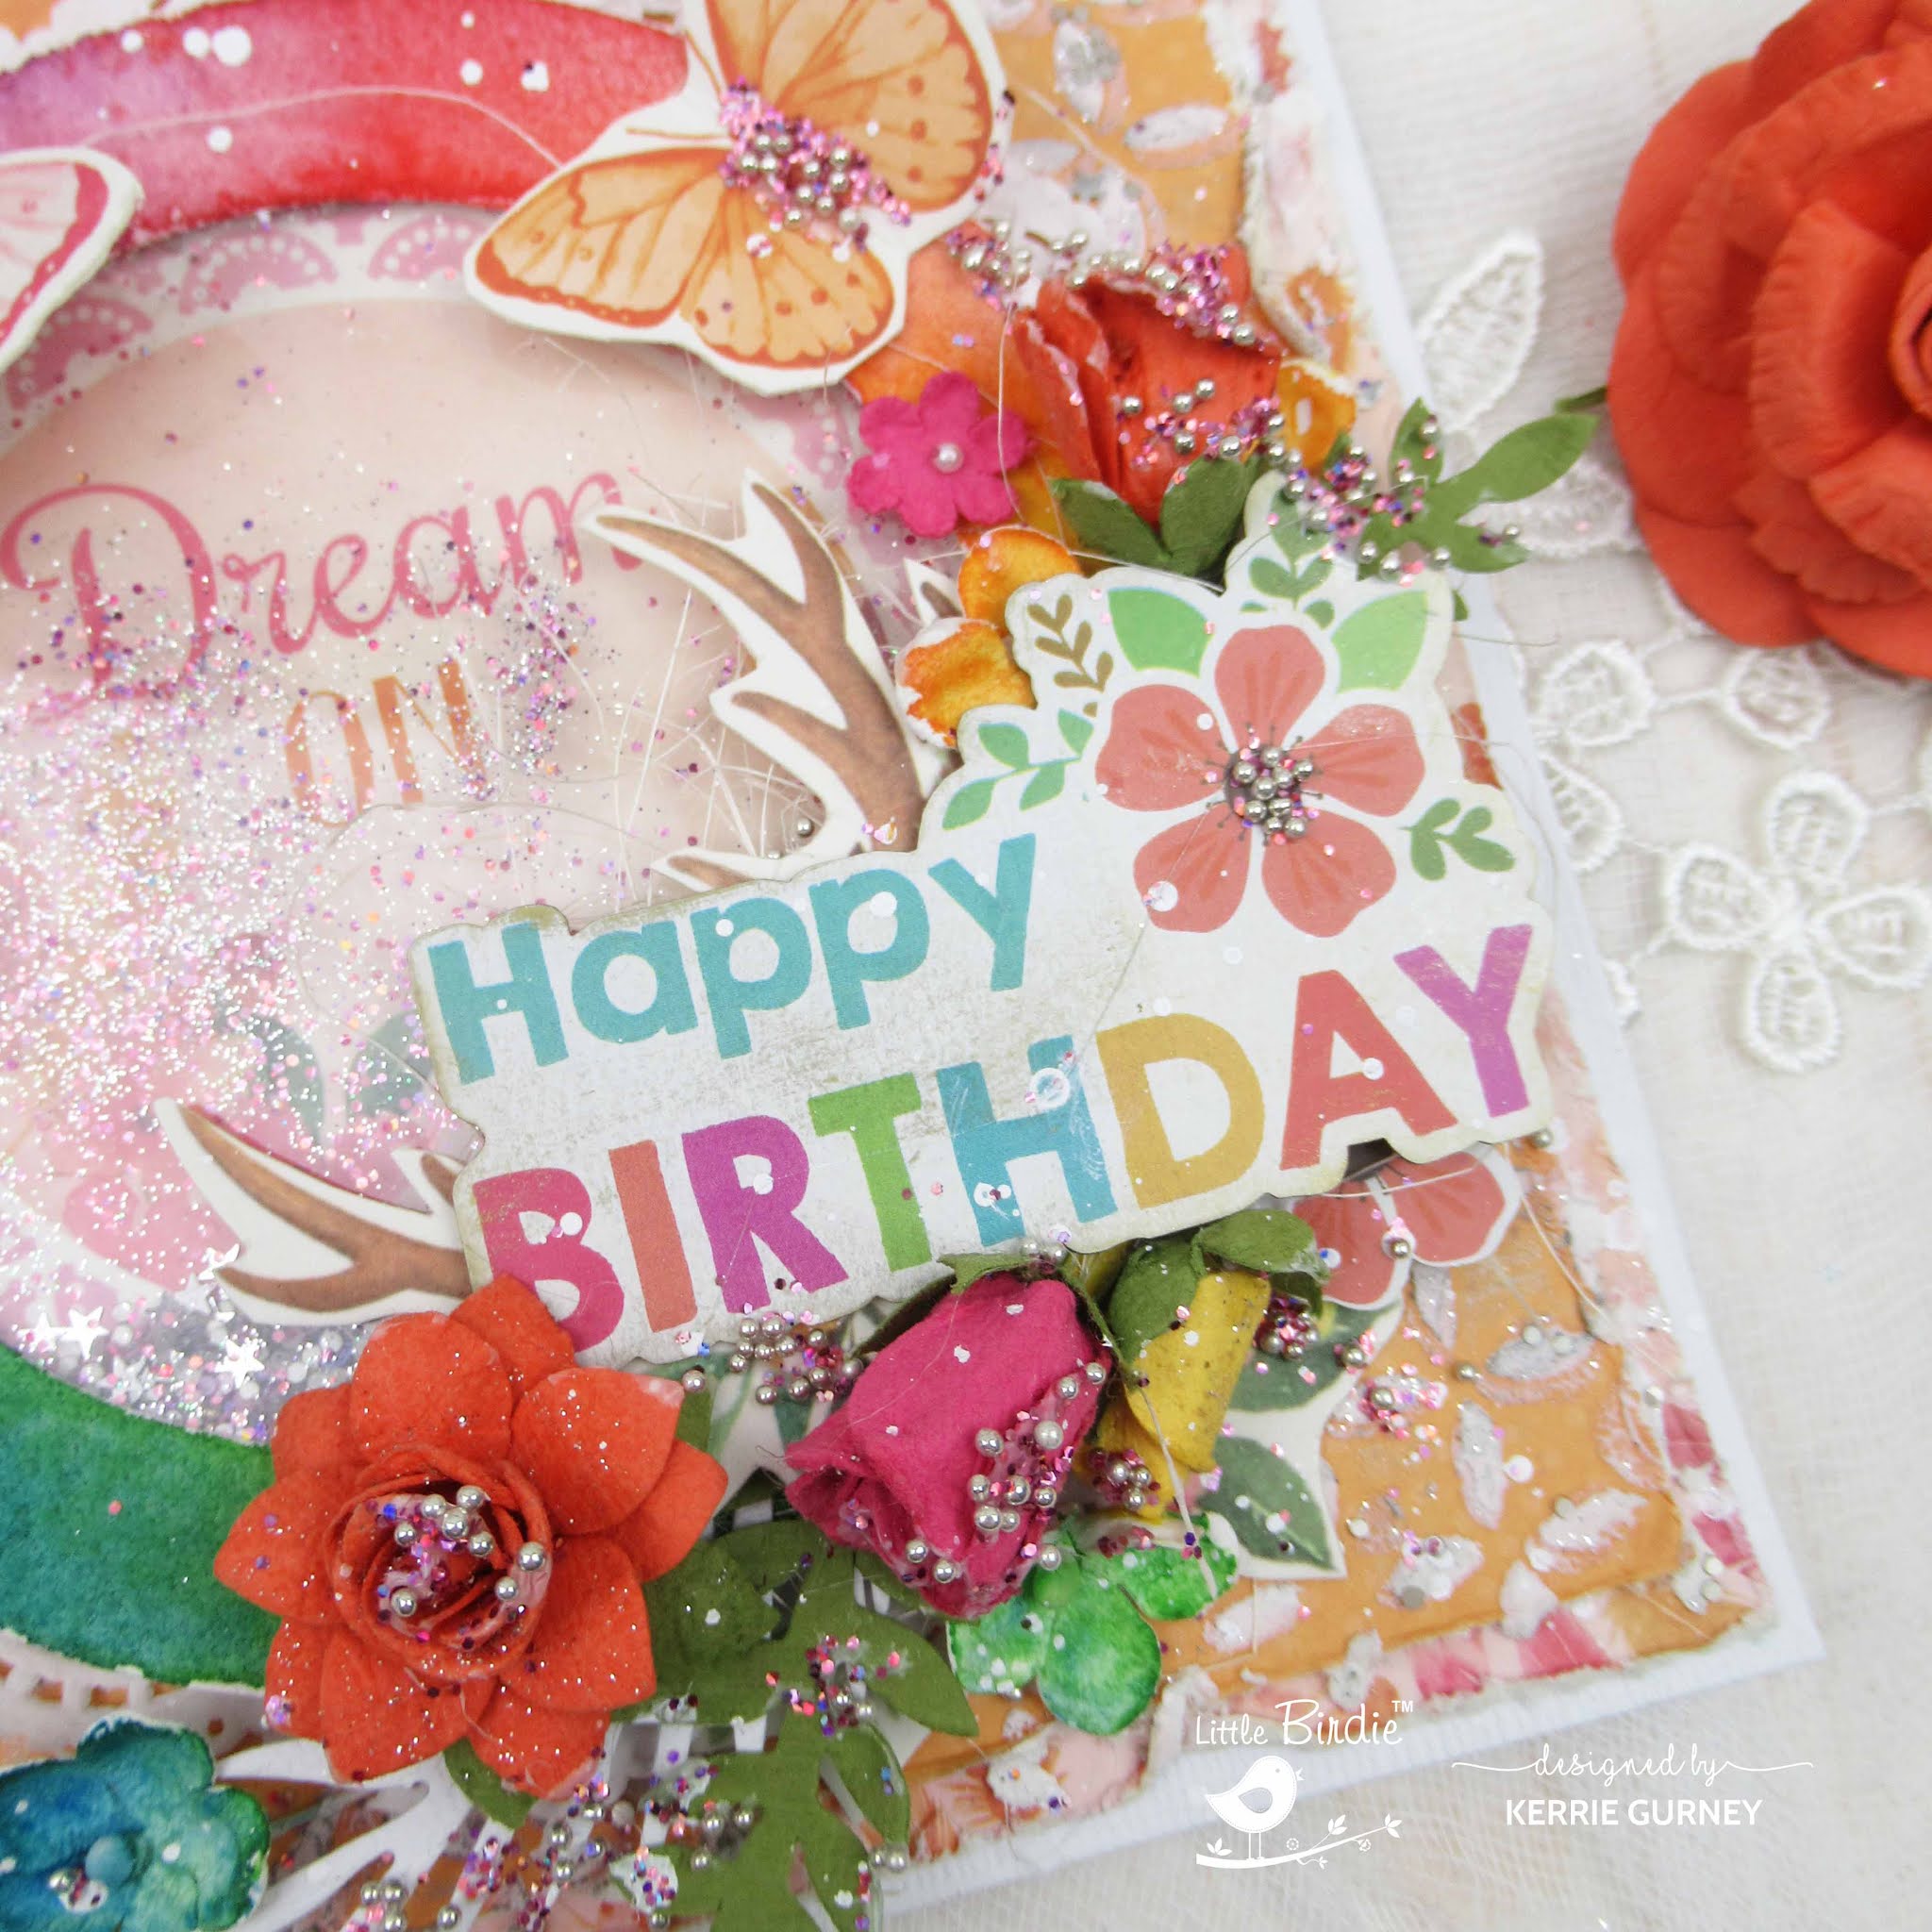
Birthday Shaker Card | Little Birdie Crafts

Hi Everyone, Kerrie here with another project for Little Birdie Crafts

Many years ago I was queen of shaker cards and I am so happy to see that they are once again popular as I do love a shaker card.
For my card today I have used Little Birdie's Boho Dreams collection as those who follow me know i love this colour combo and this collection 

first up I cut two pieces of patterned paper to use as my base layers, I then applied mixed media paste using stencil to add some texture 
while the paste was still wet i sprinkled on Silver Stars Twinkle Melange and set aside to dry
 I then watercoloured the circle frame and the flowers, once dry i pulled the frame part and created a window by adding some acetate to the back of the watercoloured frame. I also adhered a doily to the base I popped the base onto a paper doily to give another layer to my shaker 

I then double layered foam tape around the circle opening to give my shaker mix room to shake 
for my shaker mix I used a combination of Little Birdie blings 
next up I rubbed Silver Metallic Wax over the texture paste to add dimension and to take the whiteness from the paste
Once I had layered on my fussy cut pieces , flowers and sentiment I then applied some Gel Medium randomly to my cluster and sprinkled on some Micro Beads and Rainbow Sparkle and then finished off with some spatteres of watered down gesso 
a closer look at all the layers and texture


Little Birdie Crafts Products Used


Thanks for stopping by I hope you have enjoyed my tutorial,
please if you don't already follow Little Birdie Crafts on FacebookInstagram and of course their Blog 
 for fabulous tutorials from all the Design Team
You can purchase all Little Birdie Crafts products from your local crafting store or online HERE

 Happy Creating 


#kerriegurney #littlebirdiecrafts 

Tuesday, June 9, 2020

Family Fun Double Layout | Little Birdie Crafts


Hi Everyone Kerrie back with another tutorial for Little Birdie Crafts Blog using their gorgeous Watercolor Floral Ballet Paper Collection which is a gorgeous fresh floral collection on a linen type paper. I have also used a sheet of pink paper from their Pretty in Pink Collection which is also a linen paper. This layout is a great design for when you want to scrap an occasion and get more photos in your album. You can change up the first page and instead of one larger photo pop 2 or 3 smaller ones on to tell more of your story. These photos are from way back in 2004 and are ones that weren't great or in focus so i kept putting off scrapping them but I decided to just scrap them as I love these memories of our family holiday and cameras weren't what they are now and neither were my photgraphy skills which again is all part of  our story and that is what scrapbooking is all about documenting our family memories even if out of focus.


after cutting up my patterned papers and working out their placement I added some texture using mixed media paste and bricks stencil.
*Tip make sure if you are creating a double layout make sure you use base cardstock from the same pack, as you see my shades of white are different, which thankfully doesn't matter as I have covered most of it, same often gores for patterned paper packs as they can be from a different run. I actually didn't notice until I took the photo by then I thought too late  :)


You can see I have applied the mixed media paste nice and thick and random giving that natural brick look.
I sprinkled Cyrstal Glitter over the paste while still wet to add subtle sparkle


 Snip out Primed Chipboard title and paint with Pink Ballet Chalk Paint, while wet sprinkle on Crystal glitter again to give a subtle sparkle to your title


I then layered everything onto my base pages starting with the base patterned papers and then embellishing with a mix of  fussy cut flower clusters from the Watercolour Floral Ballet fussy cut sheet, handmade flowers, die cut leaves


I finished off with some splatters using watered down chalk paint


and dry brushing Gesso onto the Handmade Flowers


You can see the sparkle on the Chipbaord title


LIttle Birdie Crafts Products Used

Watercolor Floral Ballet 12x12 Paper Collection Pack
Pretty in Pink 12x12 Paper Collection Pack
12 x12 Gold Glitter Card
Bricks Stencil
Chipboard Titles
Mixed Media Paste
 Pink Ballet Chalk Paint
Gesso
Crystal Glitter
Serenade Blush Handmade Flowers


Thanks for stopping by I hope you have enjoyed my tutorial,
please if you don't already follow Little Birdie Crafts on FacebookInstagram and of course their Blog 
 for fabulous tutorials from all the Design Team
You can purchase all Little Birdie Crafts products from your local crafting store or online HERE

 Happy Creating 


#kerriegurney #littlebirciecrafts

Thursday, March 12, 2020

Thinking of You Shabby Chic Card | Little Birdie Crafts

#kerriegurney #littlebirdiecrafts

Hi Everyone
Kerrie here popping in to share a card I created for a very special friend.
I wanted this card to let her know she and her family are in my thoughts always but didn't want a traditional sympathy card.
Little Birdie Shabby Chic Bouquet paper pad was the perfect choice with it's soft colour palette


After selecting my base papers I then applied Mixed Media Paste using the Butterfly Inspire Stencil


apply the paste randomly, then lift stencil off and set aside to dry


fussy cut flower clusters and wreath


add a strip from the border patterned paper


Paint over stencilled section using a watered down mix of Pink Ballet Chalk Paint and set aside to dry or dry off using a heat tool, being careful not to buckle your paper


Paint Chipboard frame using watered down Pink Ballet Chalk Paint, dry off using heat tool and then rub edges using Rich Gold Metallic Wax 


Gently apply Rich Gold Metallic Wax to stencilled pattern, taking care not to overdue, you want to give some colour and dimension


Layer on Chipboard frame, fussy cut clusters along with some handmade flowers
Finish off with a spattering of watered down Gesso


a closer look


Chipboard, Round Frame Flowers & Butterfly


Thanks for stopping by I hope you have enjoyed my tutorial,
please if you don't already follow Little Birdie Crafts on FacebookInstagram and of course their Blog 
 for fabulous tutorials from all the Design Team
You can purchase all Little Birdie Crafts products from your local crafting store or online HERE

 Happy Creating