Showing posts with label heat embossing. Show all posts

Thursday, March 30, 2017

Rambling Birds Card | Artdeco Creations

#kerriegurney #artdecocreations #ultimatecrafts #couturecreationsaus

Hi Everyone Kerrie here  back with another project for Artdeco Creations Blog
April brings lots of special birthdays for my family and friends so I thought I would get a headstart on creating some cards.
For this special card I have used the gorgeous Ultimate Crafts Rambling Rose 6x6 paper pad along with the ephemera packs and wood veneer shapes.
This is actually a quick card to create but looks like it has taken hours


to start off i mixed some of Couture Creations Anna Griffin Pink Pigment Powder with warm water in a spray bottle to create some shimmer spray


I then sprayed some flowers and the wood veneers and dried with my heat tool


I then decided the pick was too soft on the wood veneers and so I embossed them with gold embossing powder, sprinkling in some glitter while the embossing powder was molten to add some sparkle


I then distressed and inked all the edges of all my paper and ephemera pieces and layered them onto my card base. I added a splatter of shimmer spray to the background giving a little shimmer.


next up I layered on my flowers and wood veneers, I layered the larger gold wood veneer bird over the top of the bird on the ephemera tag adding some dimension to it. I also added a bird ephemera piece and layered the smaller wood veneer bird onto it.


as you can see it is super quick but oh so beautiful to create a card using the 6x6 paper pad and ephemera and wood veneer packs.


Artdeco Creations Products used
ULT157702 Ultimate Crafts Rambling Rose, 6x6 Paper Pad
ULT157751 Ultimate Crafts Rambling Rose, Ephemera Pack
ULT157749 Ultimate Crafts Rambling Rose, Wood Veneer Shapes
CO724866 Couture Creations Anna Griffin, Mix & Match Pigments
CO723111 Couture Creations White Flowers, Adalyn Collection


Thanks for stopping by
Don't forget to follow the Artdeco Creations Blog and also follow Couture Creations|Ultimate Crafts on
FacebookPinterestInstagram and Twitter

 Happy Creating 


Wednesday, March 22, 2017

Say Cheese | Artdeco Creations

#kerriegurney #artdecocreations #ultimatecrafts #couturecreationsaus

Hi Everyone Kerrie here with a super quick layout I created for Artdeco Creations Blog using the newly released Ultimate Crafts Rambling Rose Collection
Rambling Rose is a gorgeous floral collection designed by Sue Smyth but Sue has very cleverly added some fabulous patterns on the B side of the papers that can be used for creating male layouts like the one I have created using photos from my favourite son's Contiki Tour of Europe.
(I only have one son so I always tell him he is my favourite son :))


I am not sure why but all my step by step photos were out of focus, so sorry no step by step photos but it is a simple layout with very simple techniques.
Also I added the black line as an after thought and I wish I hadn't I liked the layout much better without but hey I'm not pulling it apart and starting again :)


For my texture I used my Ultimate Crafts L'Aquarelle Rolling Mesh Stencil and Couture Creations Anna Griffin Embossing Paste. While still wet I sprinkled on some Couture Creations Mirror Gold Embossing Powder and heat set with my Couture Creations Heat Tool.
I didn't want full coverage so just sprinkle lightly, you can add more embossing powder if you like as you heat it, remember you can always add more you cannot take away.


 here is a closer look at the touch  texture coming out from under the patterned paper. I have added some fine jute string under the photos to add some more texture
I cut one of the Rambling Rose Wood Veneer Frames into two and added some brown ink and then sprayed them using Couture Creations Anna Griffin Gold Pigment Spray


For my title I again heat embossed using Couture Creations Mirror Gold Embossing Powder, this time sprinkling in some Couture Creations Copper Embossing Powder to give a variegated colour on the the title


I added some splats of Gold using Couture Creations Anna Griffin Gold Pigment which I previously  made into a spray. I have a spray for each colour of the pigments made up ready to use when I want them.

Once again I am sorry for the lack of step by step photos, I'm not sure why my camera decided not to work.


Thanks for stopping by
Don't forget to follow the Artdeco Creations Blog and also follow Couture Creations|Ultimate Crafts on
FacebookPinterestInstagram and Twitter

 Happy Creating 


Tuesday, December 20, 2016

Being Together Christmas Layout | Couture Creations + Ultimate Crafts

#kerriegurney #couturecreationsaus #ultimatecrafts

Hi Everyone Kerrie here with a super quick Christmas layout.
I don't know about you all but sometimes you just want to crank out some quick layouts so that you can get your memories documented and layouts in your albums.
Christmas is one such occasion as you want to preserve those precious memories but you also want to spend time over the holiday season creating more memories with your family.
So quick & simple is what you need and this layout is super quick to create


Now I absolutely love this photo of my Great Nephews and Niece, it brings back so many memories of when my children where young and trying to get that perfect Santa photo.
Now young Finn is the most happy smiley baby but it would seem he shares my Ashleigh's "love" of Santa :) We only ever got one Santa photo with Ashleigh she was terrified of him and would climb under chairs/tables or anything to hide if she saw him and would not stop crying/screaming until the big guy was gone.


Tip 1; use Couture Creations Turbo Glue Pen to adhere you die cuts to your project, the fine tip is perfect for those intricate die cuts and is super strong so it is also fabulous for adhering metal embellishments and flowers


Tip2; don't throw away your foam dot scraps, cut them up and use to give dimension for sentiments and larger pieces


Tip 3; Use Couture Creations Sponge Dauber to ink the edges of all your patterned papers and cardstock and it is also perfect for inking up your intricate die cuts


Tip 4; Ink the edges of your base with not only a brown ink pad but also with a watermark/clear ink pad and sprinkle with Gold Embossing powder and heat set


this gives your edge double dimension with a touch of metallic


I cut my patterned papers for my layers to the following sizes
Check; 28cm x 17.5cm
Stars & Hearts; 25.5cm x 13cm
Spot; 8.5cm x 23cm & 8.5cm x 7.5cm
Cardstock; 13cm x 17.5cm

If you want to amp your layout up a bit you can distress the edges of your papers and cardstock, add some more embellishments like pearls or add more texture with some texture paste
I kept this one nice and simple by adding something more to the background with some quick paint splatters

Thanks for stopping by
Don't forget to follow the Artdeco Creations Blog and also follow Couture Creations|Ultimate Crafts on
FacebookPinterestInstagram and Twitter
If you haven't already BOOK NOW for Creative Inspiration Live 2nd Event
the first event sold out in just 48 hours this is going to be an amazing 2 day event


I  wish you all a very Merry Christmas
and 
 Happy Christmas Creating 


Thursday, December 8, 2016

Celebrate 75

#kerriegurney
#ultimatecrafts #couturecreationsaus

Hi everyone, Kerrie here
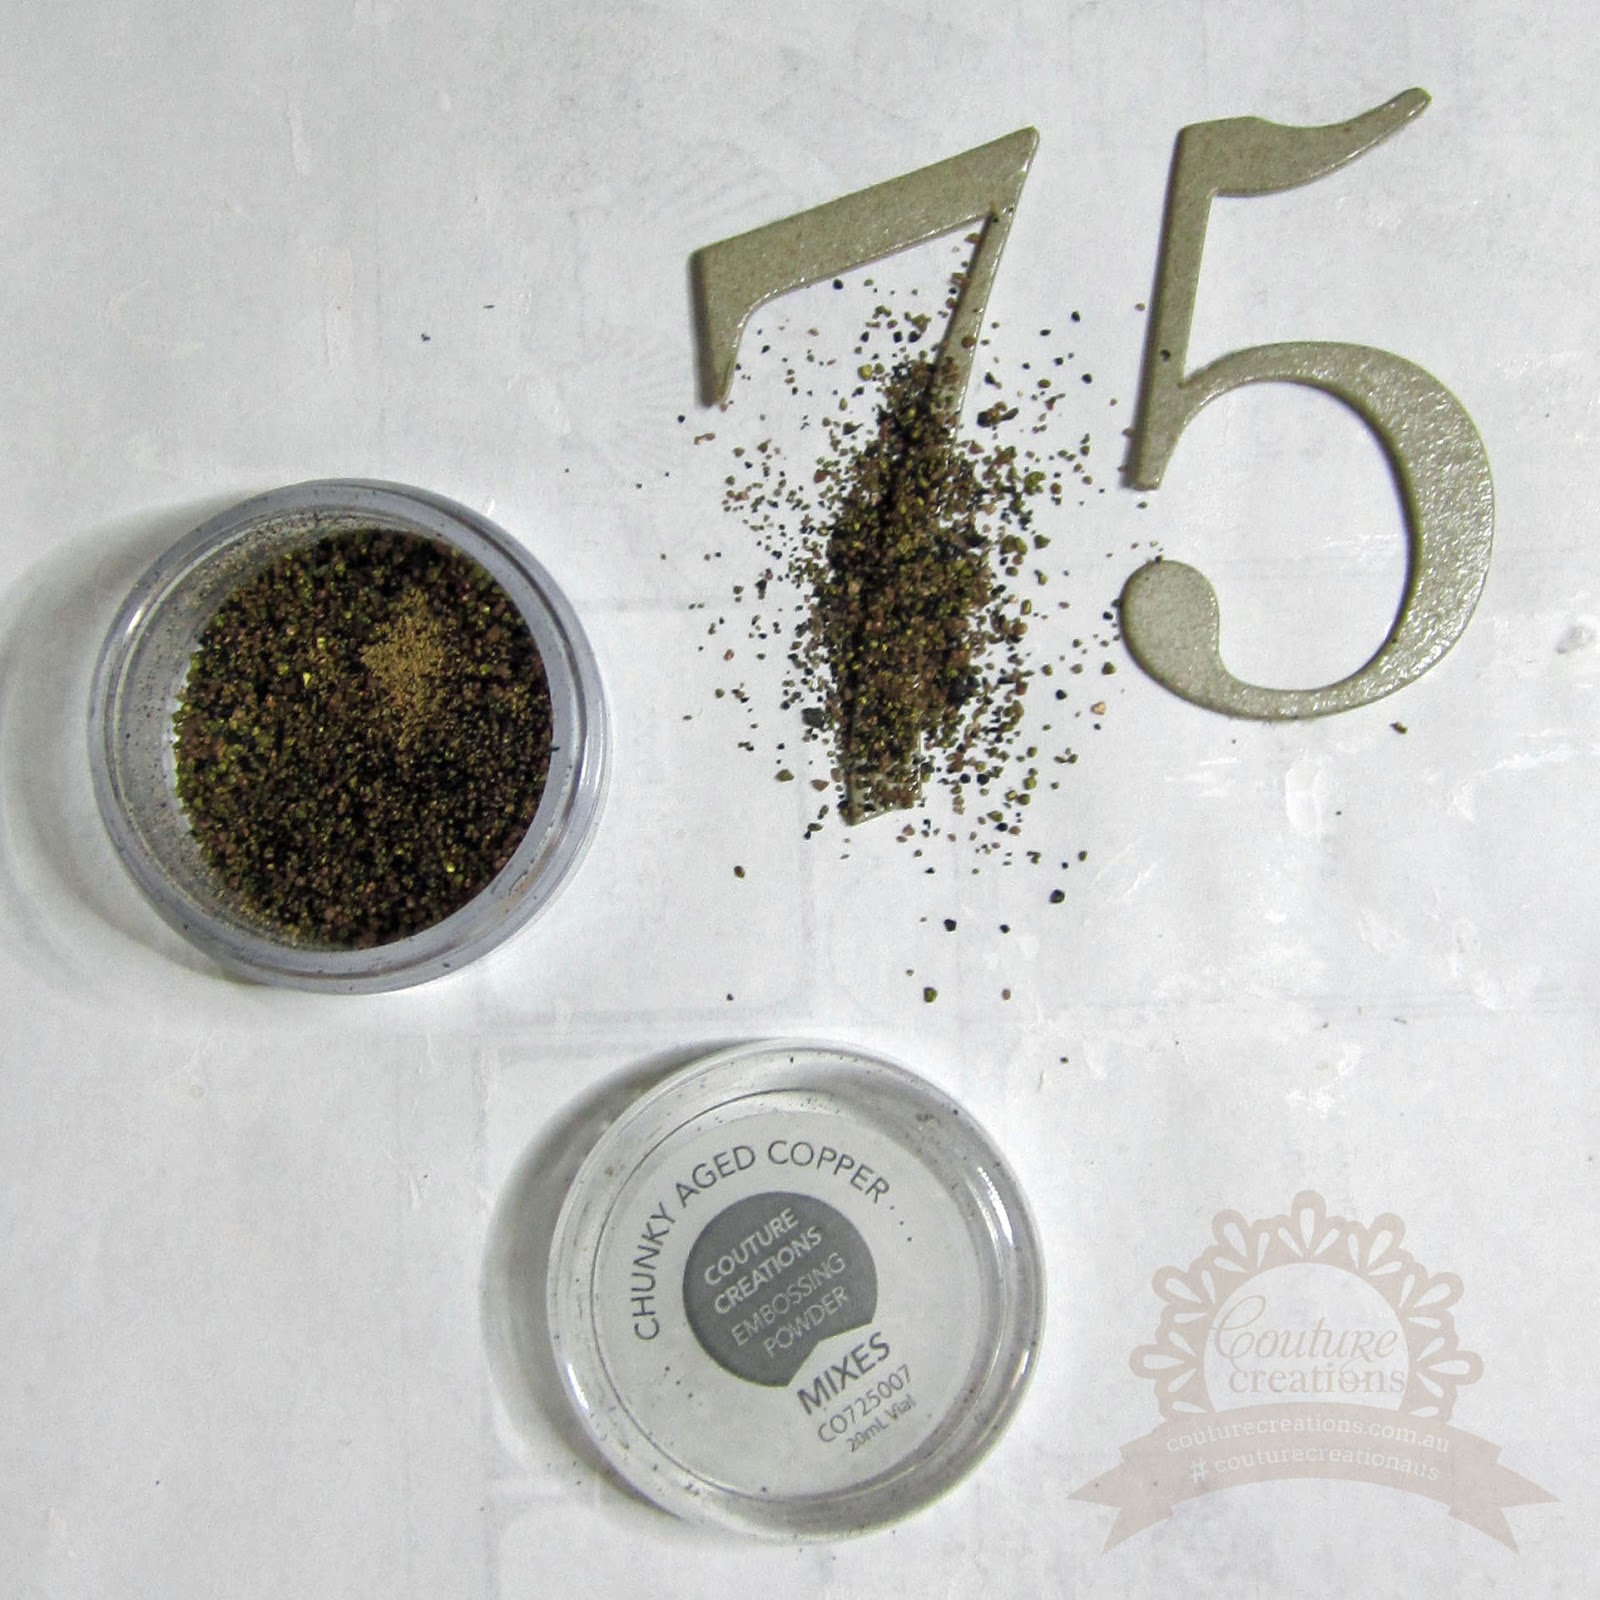
It was my Daddio's 75th birthday in November and I created this special card for him using Ultimate Crafts Ooh La La Collection along with a Couture Creations Stencil, Chunky Aged Copper Embossing Powder and a Ornamental Affair Delilah Doily Die
This card is super quick to create and is created from scraps...
shhhhh don't tell my dear old Dad that :)  


 Firstly I ink my chipboard numbers with Versamark and then sprinkled on Couture Creations Chunky aged Copper Embossing Powder
(these chipboard numbers are from Heidi Swapp's original collection release way back, yes i am a hoarder and have 3 boxes of them still )


Make sure to really cover the chipboard


Tap off excess powder and return it to the container and then heat set the embossing powder using a Couture Creations Heat Tool


You can see when the powder is all molten and leave to set which doesn't take long at all.
I love all the colours in this powder


Next I inked the whole of my card front using  brown dye ink on a sponge dauber and the
Couture Creations Be Merry, Christmas Threads Stencil 


I also coloured my Delilah Doily using the sponge dauber and brown dye ink too


Using some scrap pieces of Ultimate Crafts Ooh La La papers I cut them into pennants and distressed and inked the edges of all my paper and cardstock pieces.
Then I assembled my card, adding some metal charms to complete the card.


a closer look at that gorgeous Chunky Aged Copper Embossing Powder


Thanks for popping by

and incase you missed the HUGE ANNOUNCEMENT
Artdeco Creations
Creative Inspiration Live Event
is running a 2nd weekend and places are filling fast so don't miss out again
BOOK TODAY


 Happy Creating 


Tuesday, October 11, 2016

Live, Laugh, Love Double Layout for Ultimate Crafts | Couture Creations

#kerriegurney #ultimatecrafts #couturecreationsaus

Hi Everyone, Kerrie here
I love to create embossed backgrounds on my layouts using versamark inkpad and gold embossing powder, especially for my travel layouts as it gives them a rustic well traveled look.
As you all know I love a distress look and I also love to have things not perfect this way you have the freedom to just create and not stress about lining things up.
This selection of photos are from a trip to Tasmania my girls and I took last July, we had the best time just the three of us touring the top end of Tassi.
On this day it was freezing and the wind was fierce,  I actually had two coats on and I was still cold!!! The walk down to the bottom of the falls was windy and so very cold, but we past all these people coming back up in tshirts and I couldn't work out how they could stand the cold, that is until we walked back up!!! It was such a steep walk that we too were stripping off our coats and worked up quite the sweat walking back up.
The walk down and back were so worth it though as Liffey Falls are beautiful.


Instructions

1.       Using Versamark Ink pad ink up Ooh La La Zephyr Embossing Folder, stamp background using embossing folder on both pieces of Cinnamon Cardstock
2.       Sprinkle with Mirror Gold Embossing Powder, tap off excess powder and heat until all embossing powder is molten and set. This does not have to be perfect as we want a rustic, vintage look. Clean Embossing Folder using warm sopay water or a baby wipe straight away after stamping.
3.       Cut from Obsidian (Black) Cardstock 1 x 9cm x 25.5cm, 1 x 9cm x 27cm, 1 x 3cm x 28.5cm, 1 x 3cm x 27cm, 1 x 2.5cm x 18cm, 1 x 2.5cm 26.5cm pieces
4.       Cut from Golden Baroque pattern paper 1 x 6cm x 27cm, 1 x 6cm x 15.5cm strips
5.       Cut from Chocolate Swirls pattern paper 1 x 15cm x 15cm piece
6.       Cut a 4.5cm piece from Border strip from Ephemera pack, giving two pieces to use.
7.       Emboss both 2.5cm wide strips using Zephyr embossing folder
8.       Create pennants from the 2.5cm x 18cm embossed strip and the 3cm x 28.5cm strip
9.       Distress the edges of all paper and cardstock pieces
10.   Ink all the distressed edges of all pieces of paper and cardstock and also ink the edges of all diecuts, using sponge dauber and brown ink pad.
11.   Layer all pieces onto the embossed base, making sure to match up both sides in the center
12.   Add lace trim to page before main photo on first page
13.   Before layering main photo mat onto base wrap twine around photo mat
14.   Add photos

15.   Finish off with die cut embellishments and a sprinkling of Pearls


here is a closer look at the embossed background


3mm pearls create soft accents


Photo Sizes; 1 x 4x6 landscape, 4 x 3x4 portrait

Thanks for stopping by
Don't forget to follow the Artdeco Creations Blog and also follow Couture Creations|Ultimate Crafts on
FacebookPinterestInstagram and Twitter


 Happy Creating
