Showing posts with label lace. Show all posts

Wednesday, June 3, 2020

You can never have too much happy Mini | Celebr8


Hi Everyone Kerrie here with a super cute mini tag booklet that I created by folding just one sheet of patterned paper. This little mini works best with double sided papers but you can still create with single sided. You can add pages if you like too but I have just added tags that I will pop some photos on. This is a great mini whe you want to showcase a small event or just some of your fav photos
I have used the Loving You collection from Celebr8 it is an older collection but your local store may still have some in stock 


 Happy Creating 


#kerriegurney #celebr8

Wednesday, July 17, 2019

Celebrate 80 Card | Little Birdie Crafts


Hi Everyone Kerrie here with another tutorial for Little Birdie Crafts Blog

Last month my Mother In Law celebrated her 80th Birthday and so to commemorate her milestone birthday I created this special card for her.


I have used the New Release Amor Mio Collection, this collection is gorgeous, perfect for weddings, formals and any special occasion.


I started off by cutting my base papers with the top piece being slightly smaller than the bottom piece. I then tore the centre of the top layer at the top and bottom. I distress the edges of all pieces and rolled back the torn edges to create a peek a boo to the bottom layer


I then created some texture to the top layer using Mixed Media Paste and Script Stencil.
While the Mixed Media Paste was still wet I sprinkled on Crystal Glitter

Once dry I adhered the layers together using foam tape to give dimension between the layers and the wrapped some twine around the center before adhering to my card base


I then create my flower cluster, adding a paper doily peeking out from the layers and some lace leaves. I also added some sisal fibre to add texture 


I then swiped Rich Gold Metallic Wax to the wood veneer 80 plus I rubbed it along the edges of my layers and to the rolled pieces to add dimension to my layers


I finished off applying some Gel Medium randomly to my flowers and sisal fibres and then sprinkled on Gold Micro Beads to again add  texture to my card.
I finished off with a sprinkling of Butterflies


Little Birdie Crafts Products Used
Amor Mio 12x12 Collection Pack
Amor Mio Whitney Flowers
Amor Mio Elvina Flowers
Amor Mio Heleen Flowers
Amor Mio Marina Flowers
Amor Mio Beautiful Butterflies
Mixed Media Paste
Script Stencil
Rich Gold Metallic Wax
Gel Medium
Gold Micro Beads
Sisal Fibre

 Thanks for stopping by I hope you have enjoyed my tutorial,
please if you don't already follow Little Birdie Crafts on FacebookInstagram and of course their Blog 
 for fabulous tutorials from all the Design Team


 Happy Creating 


#kerriegurney #littlebirdiecrafts

Wednesday, April 10, 2019

Loads of Love Layout | Little Birdie Crafts

#kerriegurney #littlebirdiecrafts

Hi Everyone, it's Kerrie back again for Little Birdie Crafts.

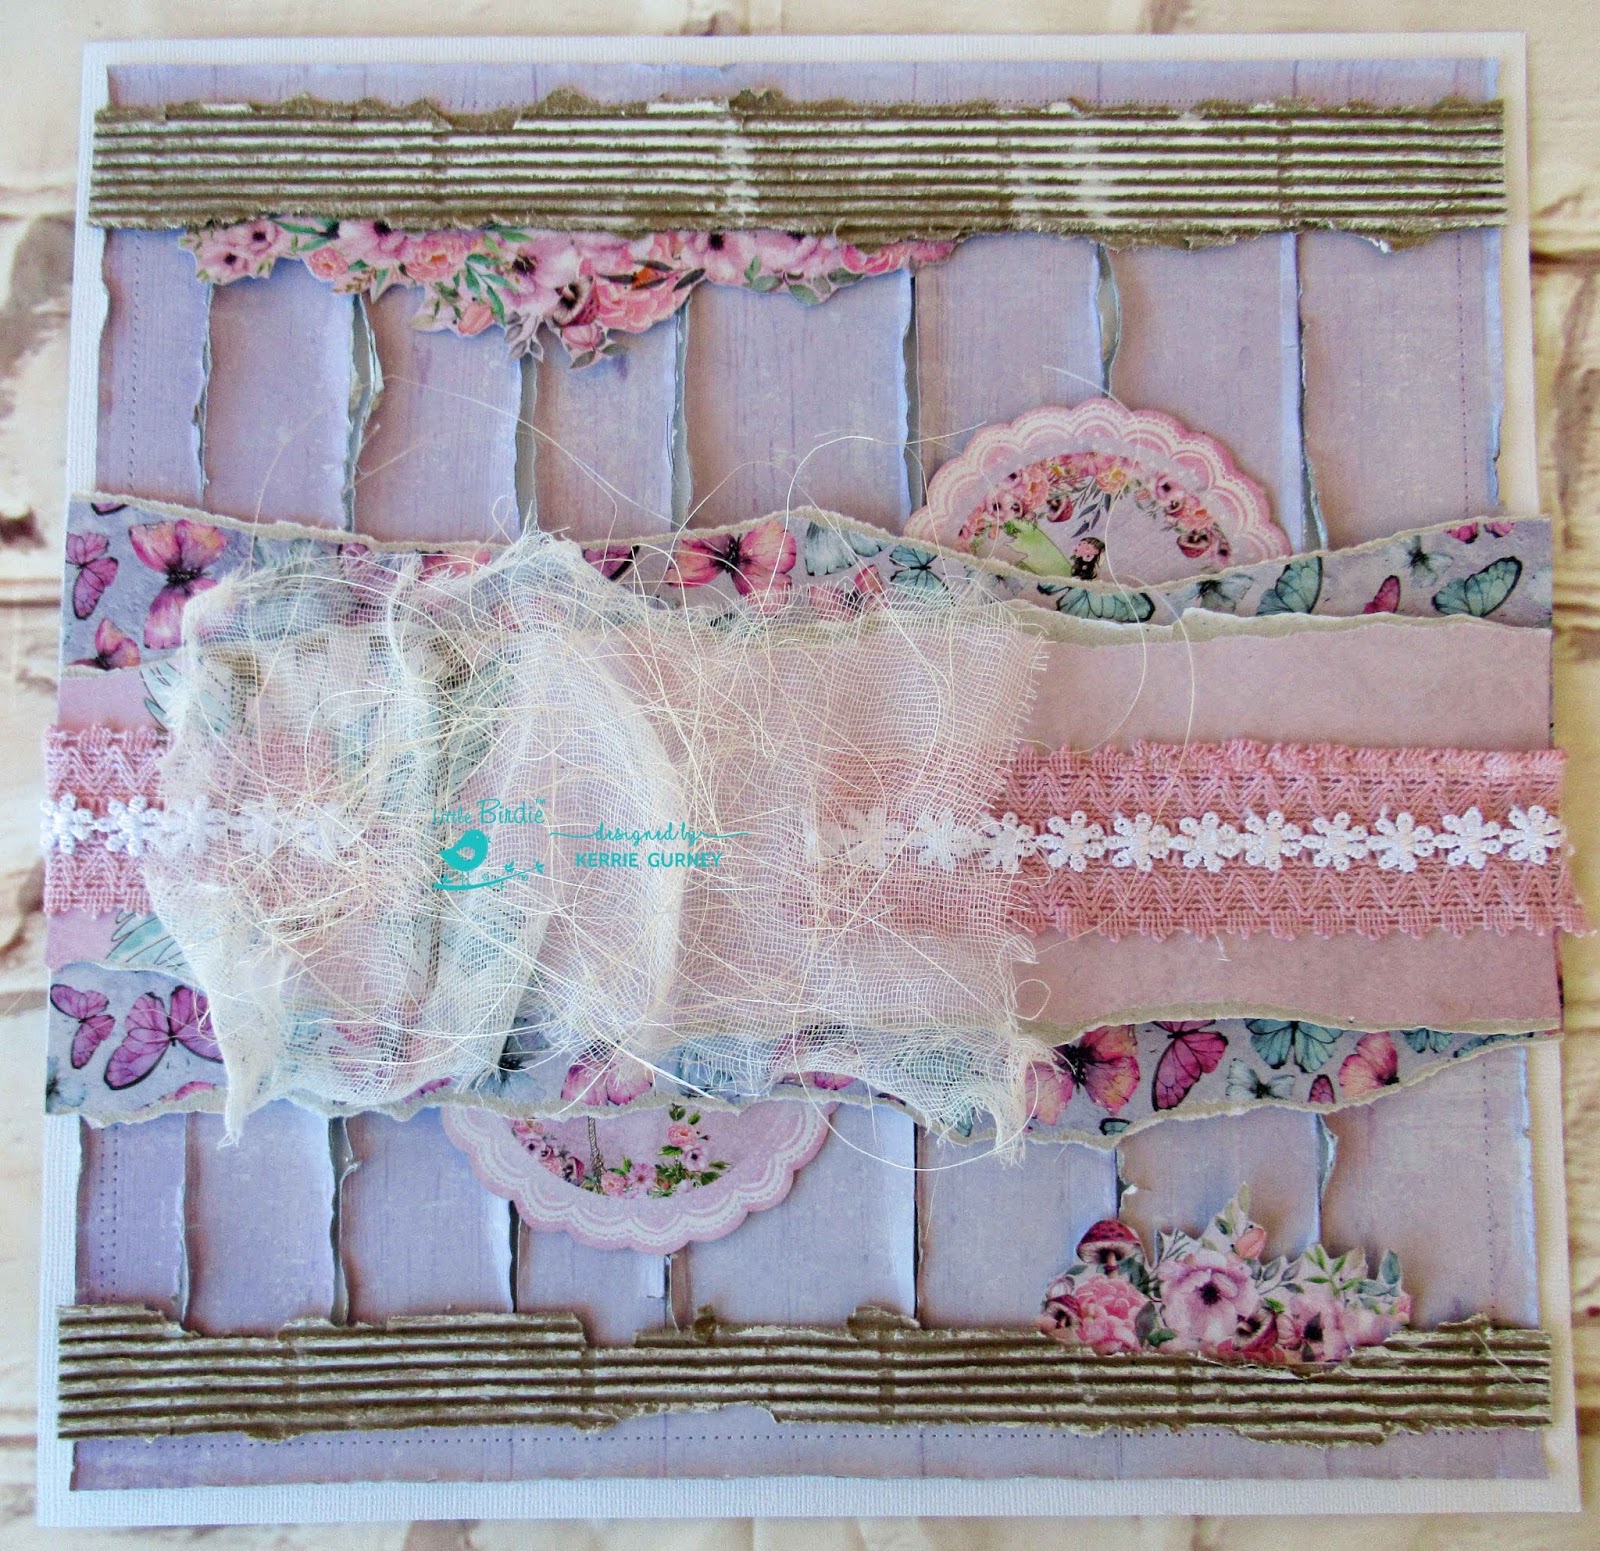
I have created my layout using Little Birdie Crafts Fairy Sparkle Patterned Paper and matching flowers along with some primed chipboard, chalk paint, gesso and sprinkles


Fairy Sparkle is a gorgeous collection and so very versatile, with gorgeous papers and die cut doilies along with journaling cards and a fussy cutting sheet.


to create my background I cut down the wood panel patterned paper sheet to 11.5"x11.5: and then using my craft knife and a ruler cut down the groove lines, leaving the top and bottom uncut so as to keep the sheet together. I then adhered it to my base sheet of white cardstock and then using my fingernail distressed the edges. I created a faux stitched border using my tracing wheel tool and ruler.


I then tore two strips a corrugated board and dry brushed Gesso onto them


I fussy cut loads of flower clusters to use from the scattered flower sheet and the sheet with the fairy on the swing and one of the journaling cards.  As you can see I cut way more than I needed these are the ones I didn't use but I now have them ready to use on another layout or a card.


I then tore two pieces of patterned paper one  from the scattered butterfly patterned paper piece and the other is the piece with the fairy on the swing left over from my fussy cutting
I popped out two doilies to use in my layers


I adhered a double layer of lace trim to the center of my layers and then added a layer of muslin and Sisal fibres. I added the flower trim to the center of lace trim to hide the join line.


I then mixed up some Lavender Blush Chalk Paint with Gesso to lighten it and then painted all my Primed Chipboard pieces


One the chipboard pieces were dry I sanded them back slightly to give a weather rustic look
I then adhered all my chipboard pieces, flowers and sprinkles on using Gel Medium
To create layers I tucked some flower clusters in between my layers and also used foam tape on some layers.


Lastly i added some splatters using Hot Pink Colour Splash


Thanks for stopping by I hope you have enjoyed my tutorial,
please if you don't already follow Little Birdie Crafts on FacebookInstagram and of course their Blog 
 for fabulous tutorials from all the Design Team


 Happy Creating 


Tuesday, December 11, 2018

beautiful inside and out | Celebr8

#kerriegurney 


I am so loving Celebr8's Beautiful Life collection, the colour pallet and the designs are so beautiful and perfect to compliment my photo


Get your Celebr8 products from your local papercrafting store in Australia and South Africa


 Happy Creating 


Monday, December 10, 2018

Follow Your Heart | Celebr8

#kerriegurney #celebr8 #celebr8australia

Hi Everyone

Celebr8's Beautiful Life collection is so beautiful and was perfect for this gorgeous photo of my nephew and his fiance'. 
I have gone old school and used lots of layers of patterned paper finishing off by adding chipboard, odds and ends and fussy cutting flowers all from the Beautiful Life collection. 


Celebr8 products are available from your local papercraft store in South Africa and Australia 


 Happy Creating