Showing posts with label muslin. Show all posts

Wednesday, June 3, 2020

You can never have too much happy Mini | Celebr8


Hi Everyone Kerrie here with a super cute mini tag booklet that I created by folding just one sheet of patterned paper. This little mini works best with double sided papers but you can still create with single sided. You can add pages if you like too but I have just added tags that I will pop some photos on. This is a great mini whe you want to showcase a small event or just some of your fav photos
I have used the Loving You collection from Celebr8 it is an older collection but your local store may still have some in stock 


 Happy Creating 


#kerriegurney #celebr8

Saturday, May 30, 2020

Happy Birthday Watercolor Card | Little Birdie Crafts

Hi everyone Kerrie here with a fresh fun watercoloured  card I created for my sister in law for her birthday


For this card I used Little Birdie Crafts products including their Watercolor Cold Pressed Frame and Flowers which I watercoloured to match the Happy Birthday Embellishments I was using. I teamed it all with paper from Aqua Melody 6x6 Paper Pad


 Happy Creating 


#kerriegurney #littlebirdiecrafts


Wednesday, July 31, 2019

Make a Wish Layout | Little Birdie Crafts


Hi Everyone Kerrie here back with another project using the gorgeous Little Birdie Crafts products.
 I have again used the NEW release Amor Mio collection this collection is so perfect for creating neutral looking projects with its soft gold and silver tones

I create a simple layout that you can recreate so easily, it is simple but filled with soft textures to give your layout body without taking away from your photos.


Unfortunately my Mother in Law is awful when it comes to getting of good photo of her, she always looks away from the camera and so it is very rare to get a photo of her looking down the the lens. I placed the photo I did manage to get of her to the back so I could crop out the person standing next to her so I know it makes the focus photo make you look to the right but hey life doesn't always give your picture perfect moments and as it was her 80th Birthday I wanted to scrap both photos as this is her and this is real life.
(My Mum is the same, the older generation didn't grow up with cameras being so readily available so they are not comfortable in front of the camera unlike the younger generation especially my youngest daughter)


I started off by adhering a piece of Muslin to my base using Gel Medium. I only adhered it through the centre where my layers would cover it and slightly on the edges to hold the pinched sides in place


I then cut some pieces of the patterned papers for my layers and adhered them to the base
I layered some Sisal Fibre under my flower cluster to give more texture to the cluster


I coloured my Primed Chipboard Title using Rich Gold Metallic Wax


To add my splatters I mixed White Gesso with Tattered Lace Chalk Paint and spritzed with water to make it easy to splatter and then covered my photos and splattered away, you can do this as little or or much as you like


here are some close ups so that you can see the texture and details


Little Birdie Crafts Products Used
Amor Mio Collection Pack
Amor Mio
Amor Mio Elvina Flowers
Amor Mio Heleen Flowers
Amor Mio Marina Flowers
Gel Medium
White Gesso
Tattered Lace Chalk Paint
Sisal Fibre
Muslin


 Thanks for stopping by I hope you have enjoyed my tutorial,
please if you don't already follow Little Birdie Crafts on Facebook, Instagram and of course their Blog 
 for fabulous tutorials from all the Design Team


 Happy Creating 


 Happy Creating 


#kerriegurney  #littlebirdiecrafts

Wednesday, April 10, 2019

Loads of Love Layout | Little Birdie Crafts

#kerriegurney #littlebirdiecrafts

Hi Everyone, it's Kerrie back again for Little Birdie Crafts.

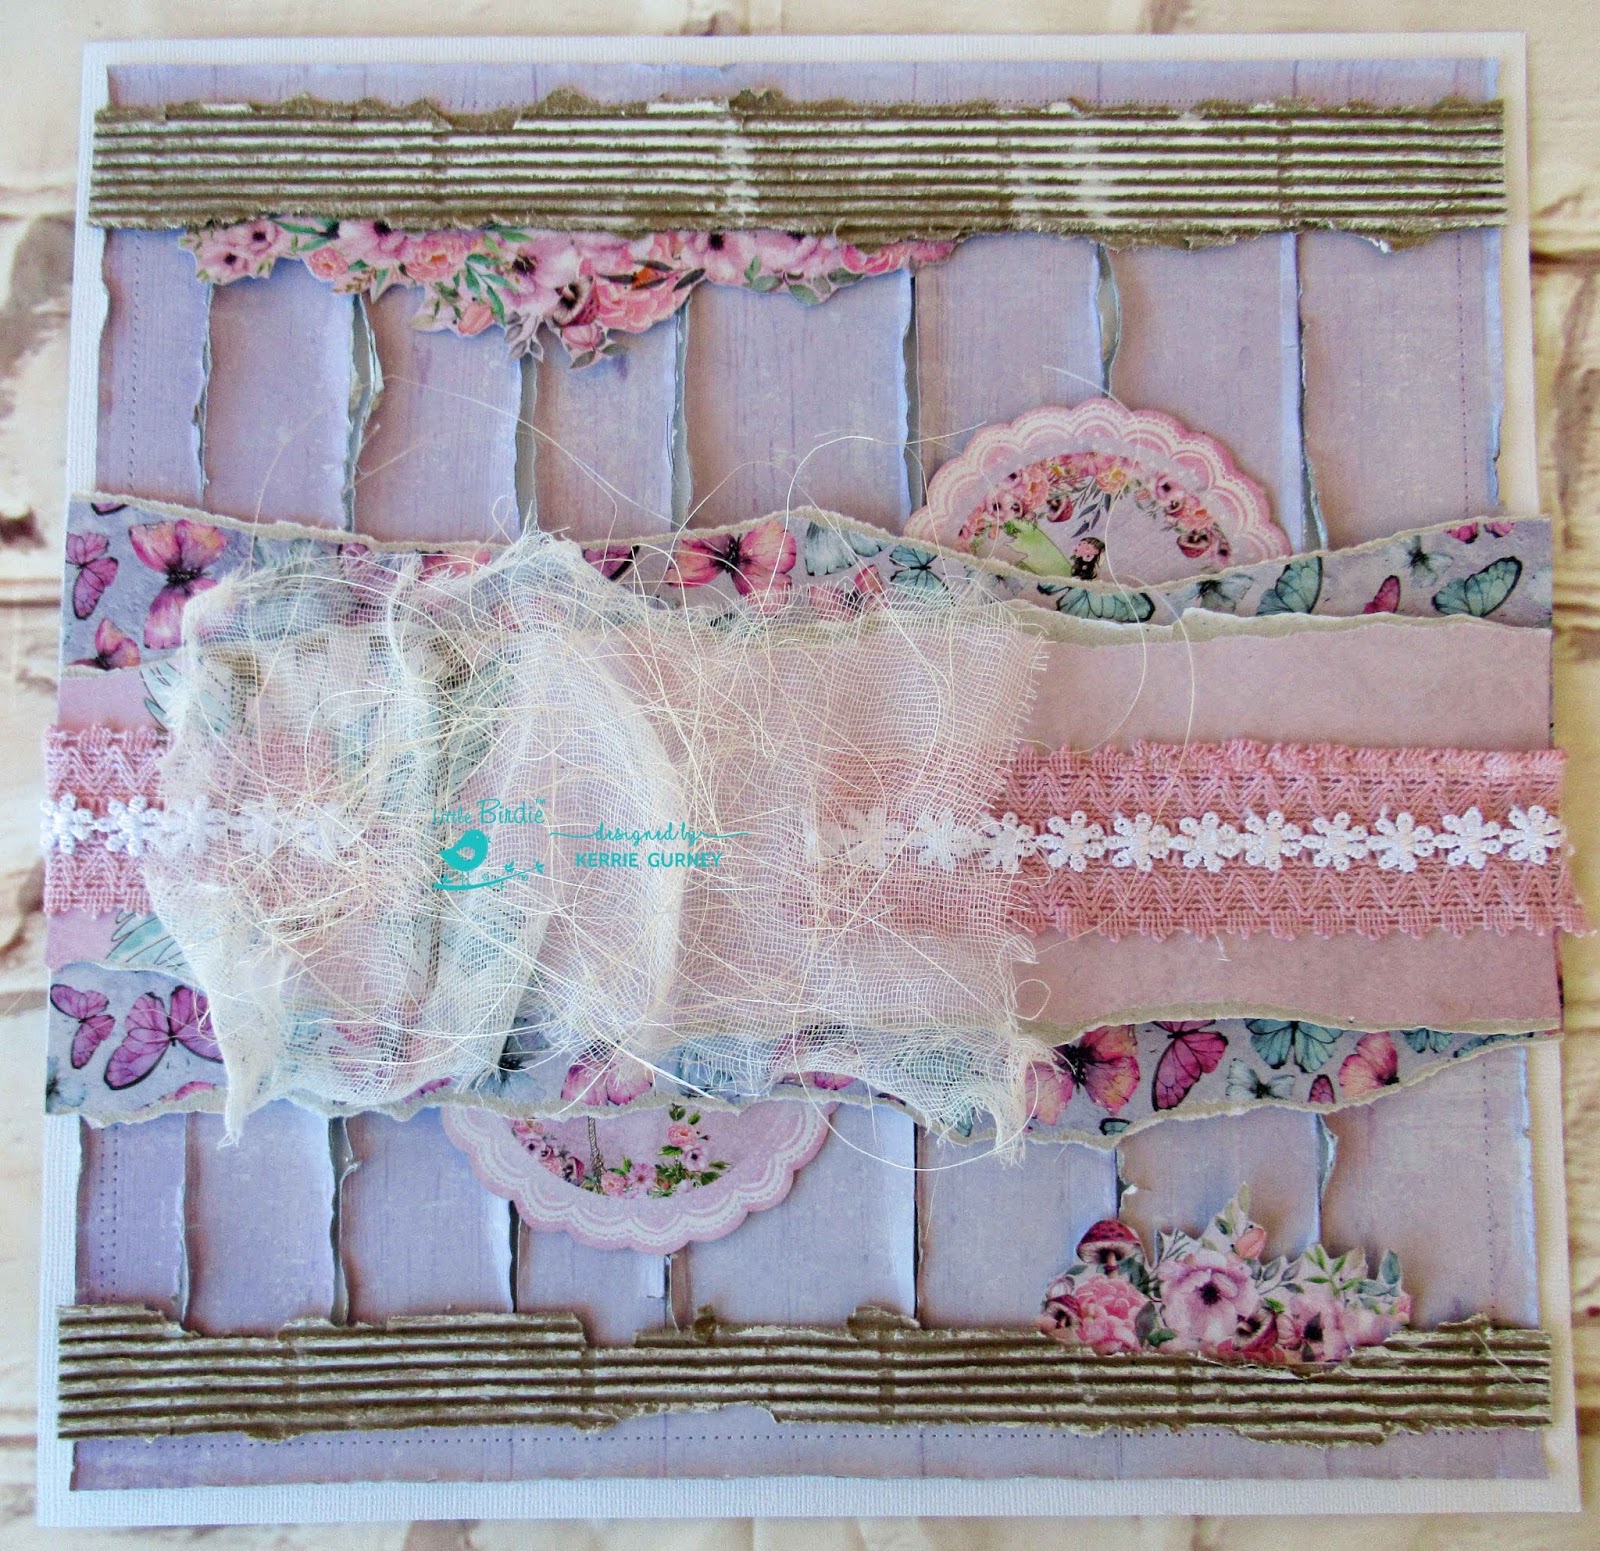
I have created my layout using Little Birdie Crafts Fairy Sparkle Patterned Paper and matching flowers along with some primed chipboard, chalk paint, gesso and sprinkles


Fairy Sparkle is a gorgeous collection and so very versatile, with gorgeous papers and die cut doilies along with journaling cards and a fussy cutting sheet.


to create my background I cut down the wood panel patterned paper sheet to 11.5"x11.5: and then using my craft knife and a ruler cut down the groove lines, leaving the top and bottom uncut so as to keep the sheet together. I then adhered it to my base sheet of white cardstock and then using my fingernail distressed the edges. I created a faux stitched border using my tracing wheel tool and ruler.


I then tore two strips a corrugated board and dry brushed Gesso onto them


I fussy cut loads of flower clusters to use from the scattered flower sheet and the sheet with the fairy on the swing and one of the journaling cards.  As you can see I cut way more than I needed these are the ones I didn't use but I now have them ready to use on another layout or a card.


I then tore two pieces of patterned paper one  from the scattered butterfly patterned paper piece and the other is the piece with the fairy on the swing left over from my fussy cutting
I popped out two doilies to use in my layers


I adhered a double layer of lace trim to the center of my layers and then added a layer of muslin and Sisal fibres. I added the flower trim to the center of lace trim to hide the join line.


I then mixed up some Lavender Blush Chalk Paint with Gesso to lighten it and then painted all my Primed Chipboard pieces


One the chipboard pieces were dry I sanded them back slightly to give a weather rustic look
I then adhered all my chipboard pieces, flowers and sprinkles on using Gel Medium
To create layers I tucked some flower clusters in between my layers and also used foam tape on some layers.


Lastly i added some splatters using Hot Pink Colour Splash


Thanks for stopping by I hope you have enjoyed my tutorial,
please if you don't already follow Little Birdie Crafts on Facebook, Instagram and of course their Blog 
 for fabulous tutorials from all the Design Team


 Happy Creating 


Friday, August 19, 2016

Life is About Moments | Couture Creations

#kerriegurney #couturecreationsaus

Hi Everyone Kerrie here with a layout I created for
Artdeco Creations Blog 
using the gorgeous Couture Creations Sea Breeze Collection
along with the Couture Creations Anna Griffin Mixed Media Collection


I am so excited that this collection is now available worldwide. I have been lucky to have had these products since before my trip to South Africa and finally I can share some projects created using them with you all.
This collection is amazing the pastes are so light and dry quickly so you don't need to dry them off with a heat tool and those pigments oh my they are just perfect for adding a pearlecent touch to all your projects and the Gesso spreads and covers beautifully.
Anyway onto my tutorial for my layout, I love this photo of us all in Noumea, Trevor was the best cruise husband putting up with all us girls.


Firstly add some Blue and Green Pigment colour to the Embossing Paste


mixed it through
(I actually added a smidge of Yellow pigment too to tone lighten the colour slightly)


Next using either a Pallet Knife or you can use a Couture Creations Lift Off Tool, spread the Embossing Paste over the stencil


Lift off the Stencil, These Couture Creations Anna Griffin Stencils are such a good quality that they are a bit thicker than most stencils and so give real depth to your project.
Set Aside to dry and then cut and ink all the edges of your Sea Breeze patterned papers


To ink the edges of the base cardstock, sponge some ink onto your craft mat and then work the ink onto the edge of the base cardstock from your craft mat. This gives more intense inking on the edge with a softer look onto inside edges.
You have more control over how much ink your want your layout to have


Next up change the colour of the metal charm using 3D Pearl Drops


and while the Pearl Drops are still wet paint on to Gold Pigment
(I also added a touch of Copper Pigment to age the charm a bit more)


here is a closer look at my embellishment cluster, I also added broken shells 


The Title on my page is a gift from the lovely Cariena Basson and is one of her exclusive titles.


Thanks for stopping by
Don't forget to follow the Artdeco Creations Blog and also follow Couture Creations|Ultimate Crafts on
Facebook, Pinterest, Instagram and Twitter


 Happy Creating