Showing posts with label decorative dies. Show all posts

Wednesday, December 8, 2021

Celebrate 21 | Cocoa Vanilla Studio

I cannot believe my baby is 21!!!

 thankfully just before her 21st birthday in December 2020 under strict Covid regulations we were able to have a small celebration for her with immediate family and her closest friends 
It was great night and everyone enjoyed being out and catching up 
We are so very proud of our baby girl who is working fulltime as a department manager at a major department store while studying a double degree  Bachelor of Business and Human Resources and still she remains  a HOOT 


 these very precious photos are T with her grandparents 


Happy Creating 


#kerriegurney

Wednesday, November 17, 2021

Deck The Halls Envelope Mini Album | Couture Creations


Hi Everyone Kerrie back with another project as Guest Designer for Couture Creations 

For this project I created a  Christmas Mini Album using a packet of Christmas Envelopes from the Deck the Halls Collection, this is a super quick way to create a 4x6 mini album with the pockets already created for you


I started off by adhering two envelopes together back to back just on the flap, I just used the tape already there for sealing the envelopes


I used the whole pack of envelopes, so adhered 4 sets together and left two singles for the front and back of the mini album 


Then you just slide the flaps of two sets into one envelope which will be the front envelope


I then tucked the flap of the back envelope into itself and then slide the remaining 2 sets in and just like that your mini album base has been created.
You can secure the flaps more securely by adding a little adhesive to to each flap stop them sliding around 


I then embellished the front and the inner pages using a selection of Die Cut Shapes, Ephemera pieces, Patterned Paper and Sentiments
I also added a 4x6 mat to pop my photos on using Snow White Cardstock and finishing the matt off with a black hand drawn pen line to give some definition to the photo mat blocks 


There is room for adding tags and/or mementos from your Christmas along with some journaling
I finished off with red ribbon tied around twice as a closure for my album which you can easily untie to open up

TIP- keep everything fairly flat to keep so that the album is not too bulky remembering  you still have to add photos 


I hope you have enjoyed my tutorial and remember if you recreate this min album don't forget to share on your socials and tag #couturecreationsaus and me #kerriegurney

Until Next Time 
Don't forget to follow Couture Creations Blog as well as on Facebook and Instagram 

Couture Creations Products Used


Happy Creating 


#kerriegurney

Wednesday, October 13, 2021

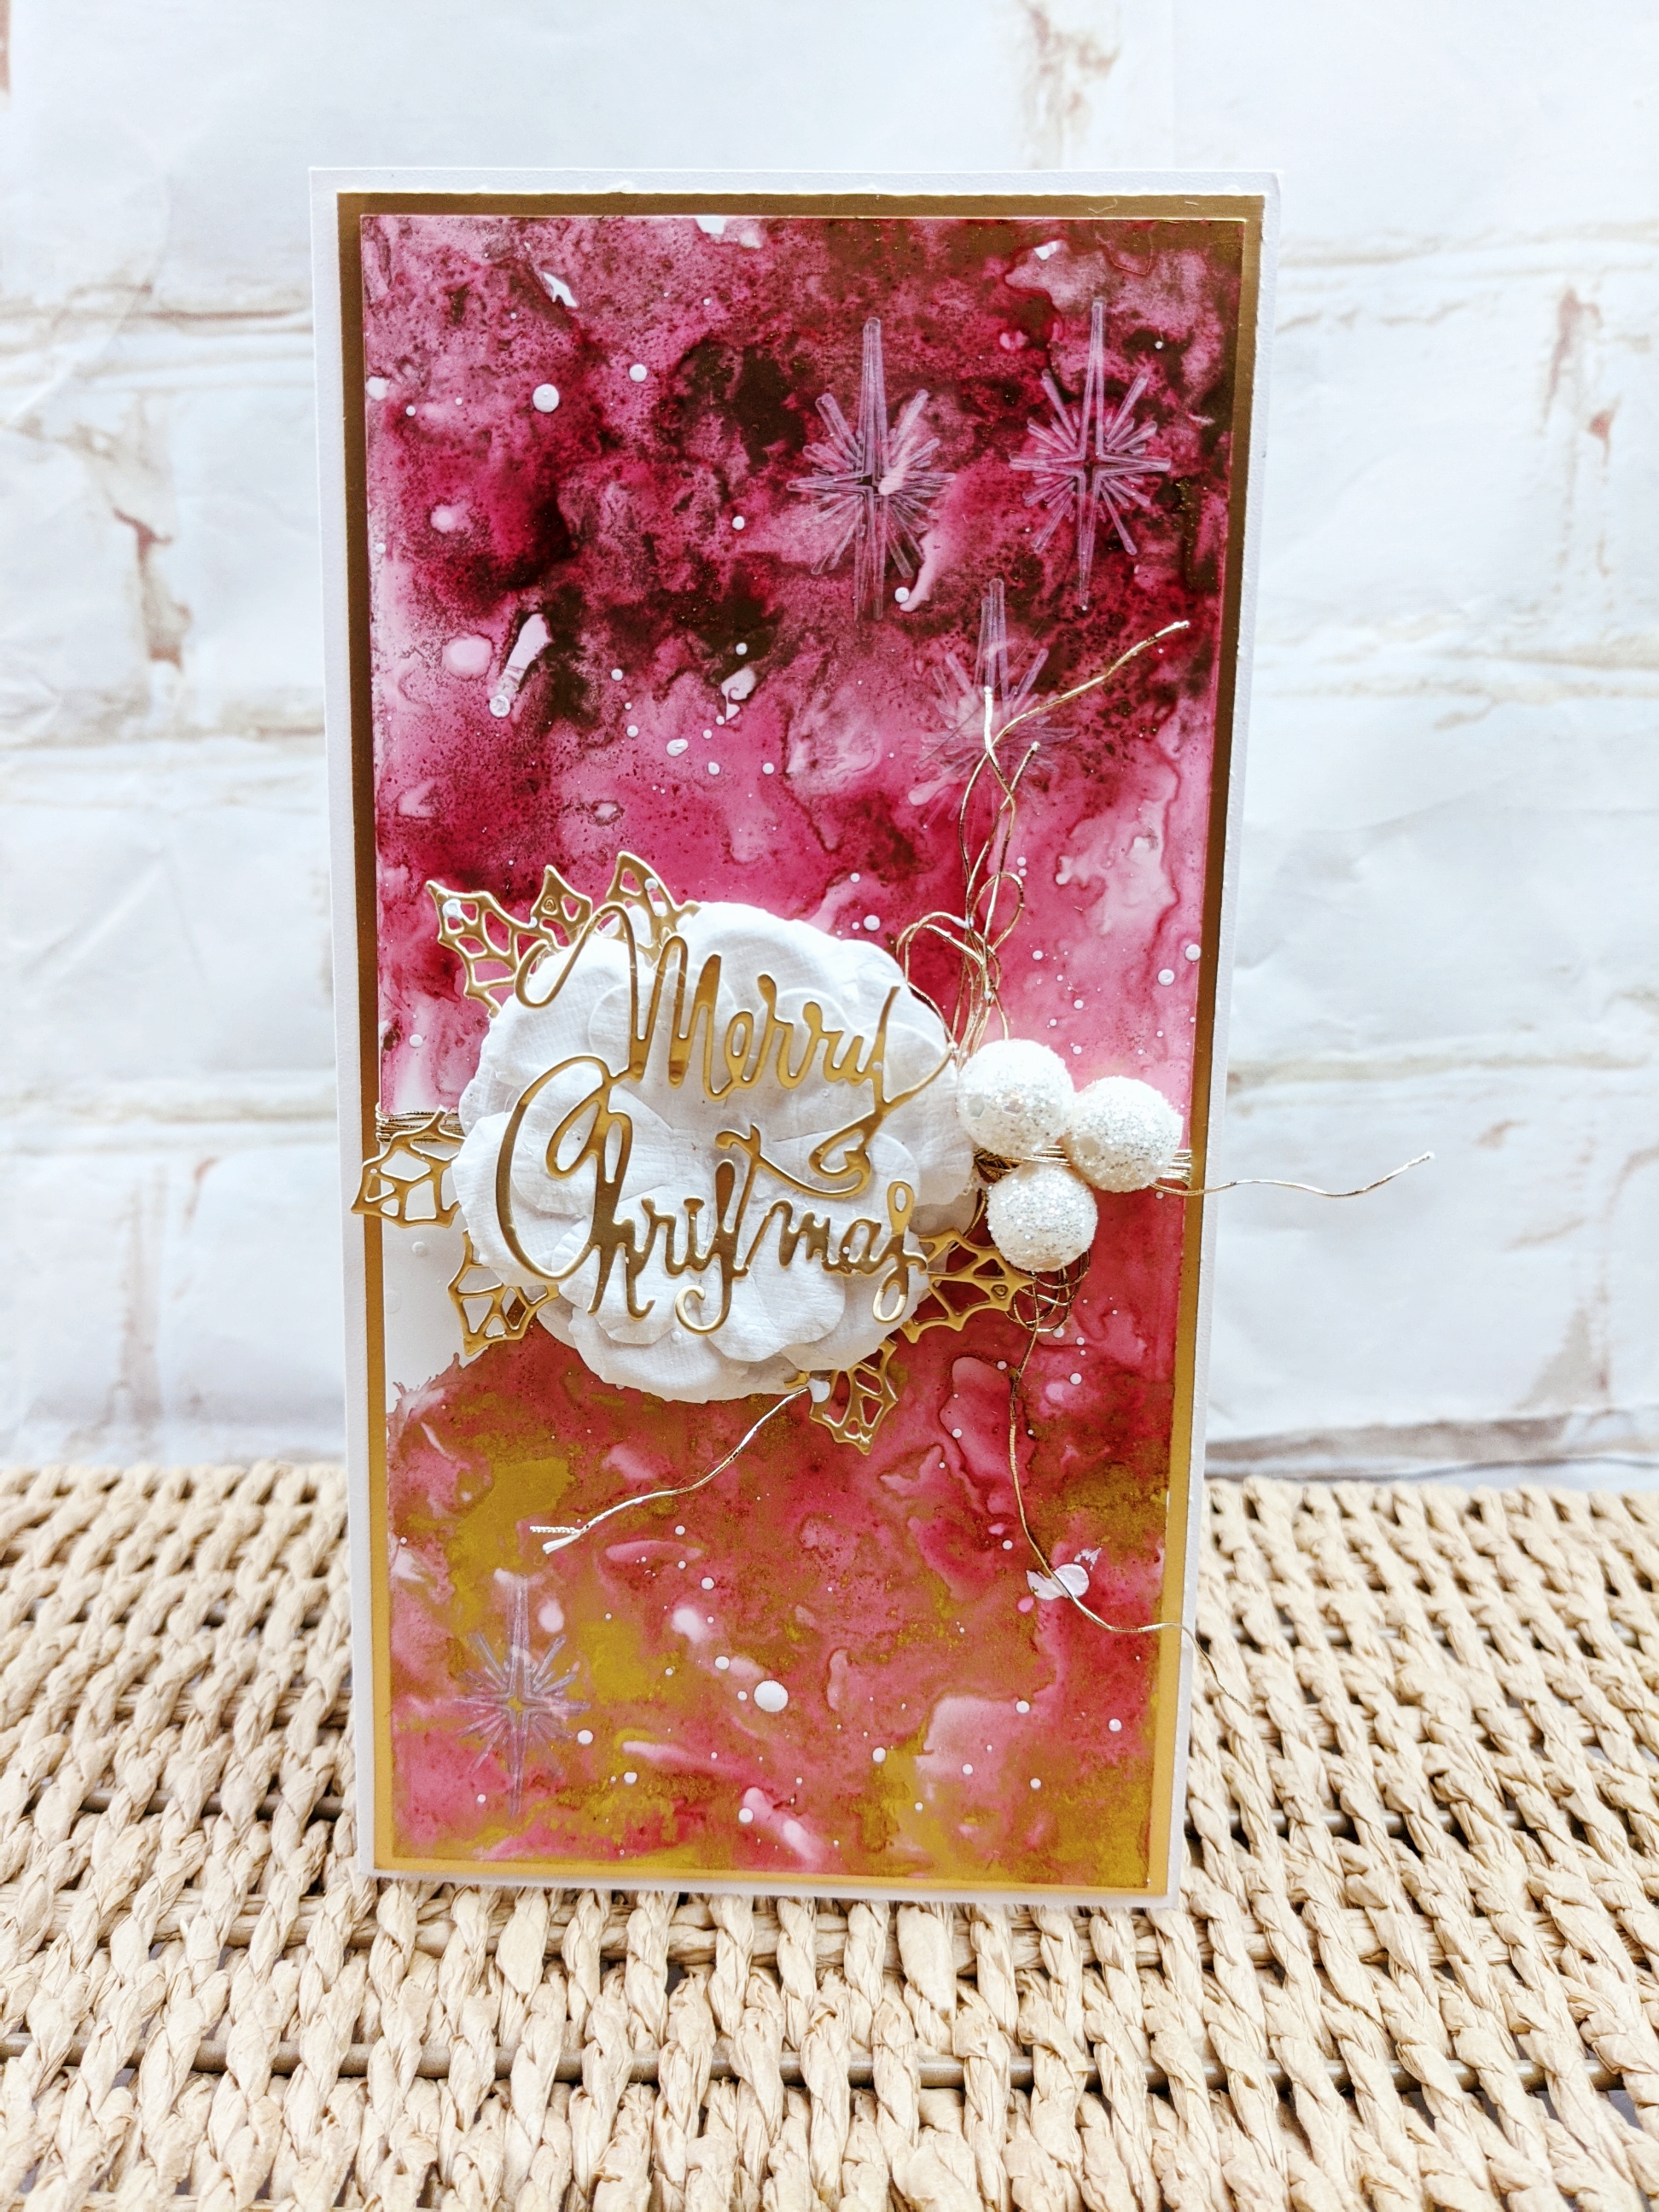
Merry Christmas | Couture Creations


Hi Everyone Kerrie back again with another Christmas Card I have created as  Guest Designer for Couture Creations
For this card i went with non traditional Christmas Colours and created a Watermelon Pink and Gold background using Couture Creations Alcohol Inks and a little stamping.
This card is once you can again create in multiples as it is quick an simple 


I started my alcohol ink background by dropping on some Alcohol Ink Blending Solution onto Yupo Paper, then dropping on Watermelon Alcohol Ink, move it around using the ink blower 


next i added the Golden Age Gold Alcohol ink and again moved it around using the blower
add some more Blending Solution to help move the gold 


I then added a touch more gold with the Pearl Gold Alcohol Ink 


leave to dry 


When my background was completely dry I stamped on some Christmas Stars using Artic White Stayz in Place Ink Pad and the Christmas Star from the Christmas Tree Scene Stamp Set


Stamping creates  subtle layers to your background 


I then added  Holly Sprig and merry Christmas Sentiment die cut from Mirror Board, I broke the Holly Sprig up and tucked into the flower petals
I finished off with some gold twine, paper flower, pearl balls and some splatters of the Artic White Alcohol Ink 


Happy Creating 


#kerriegurney

Wednesday, September 29, 2021

Christmas Trees Card | Couture Creations

Hi Everyone Kerrie back again Guest Designing for Couture Creations
this time I have created a layered Christmas Tree card using the new Christmas Tree Scene Stamp from the Deck the Halls Collection.
This is a versatile stamp set and you can just stamp and colour using markers or you could create a super cute shaker card using the tree but i have gone with creating my trees using Couture Creations Alcohol Inks, these are just too fun to create with and every time you use them you get a different background  

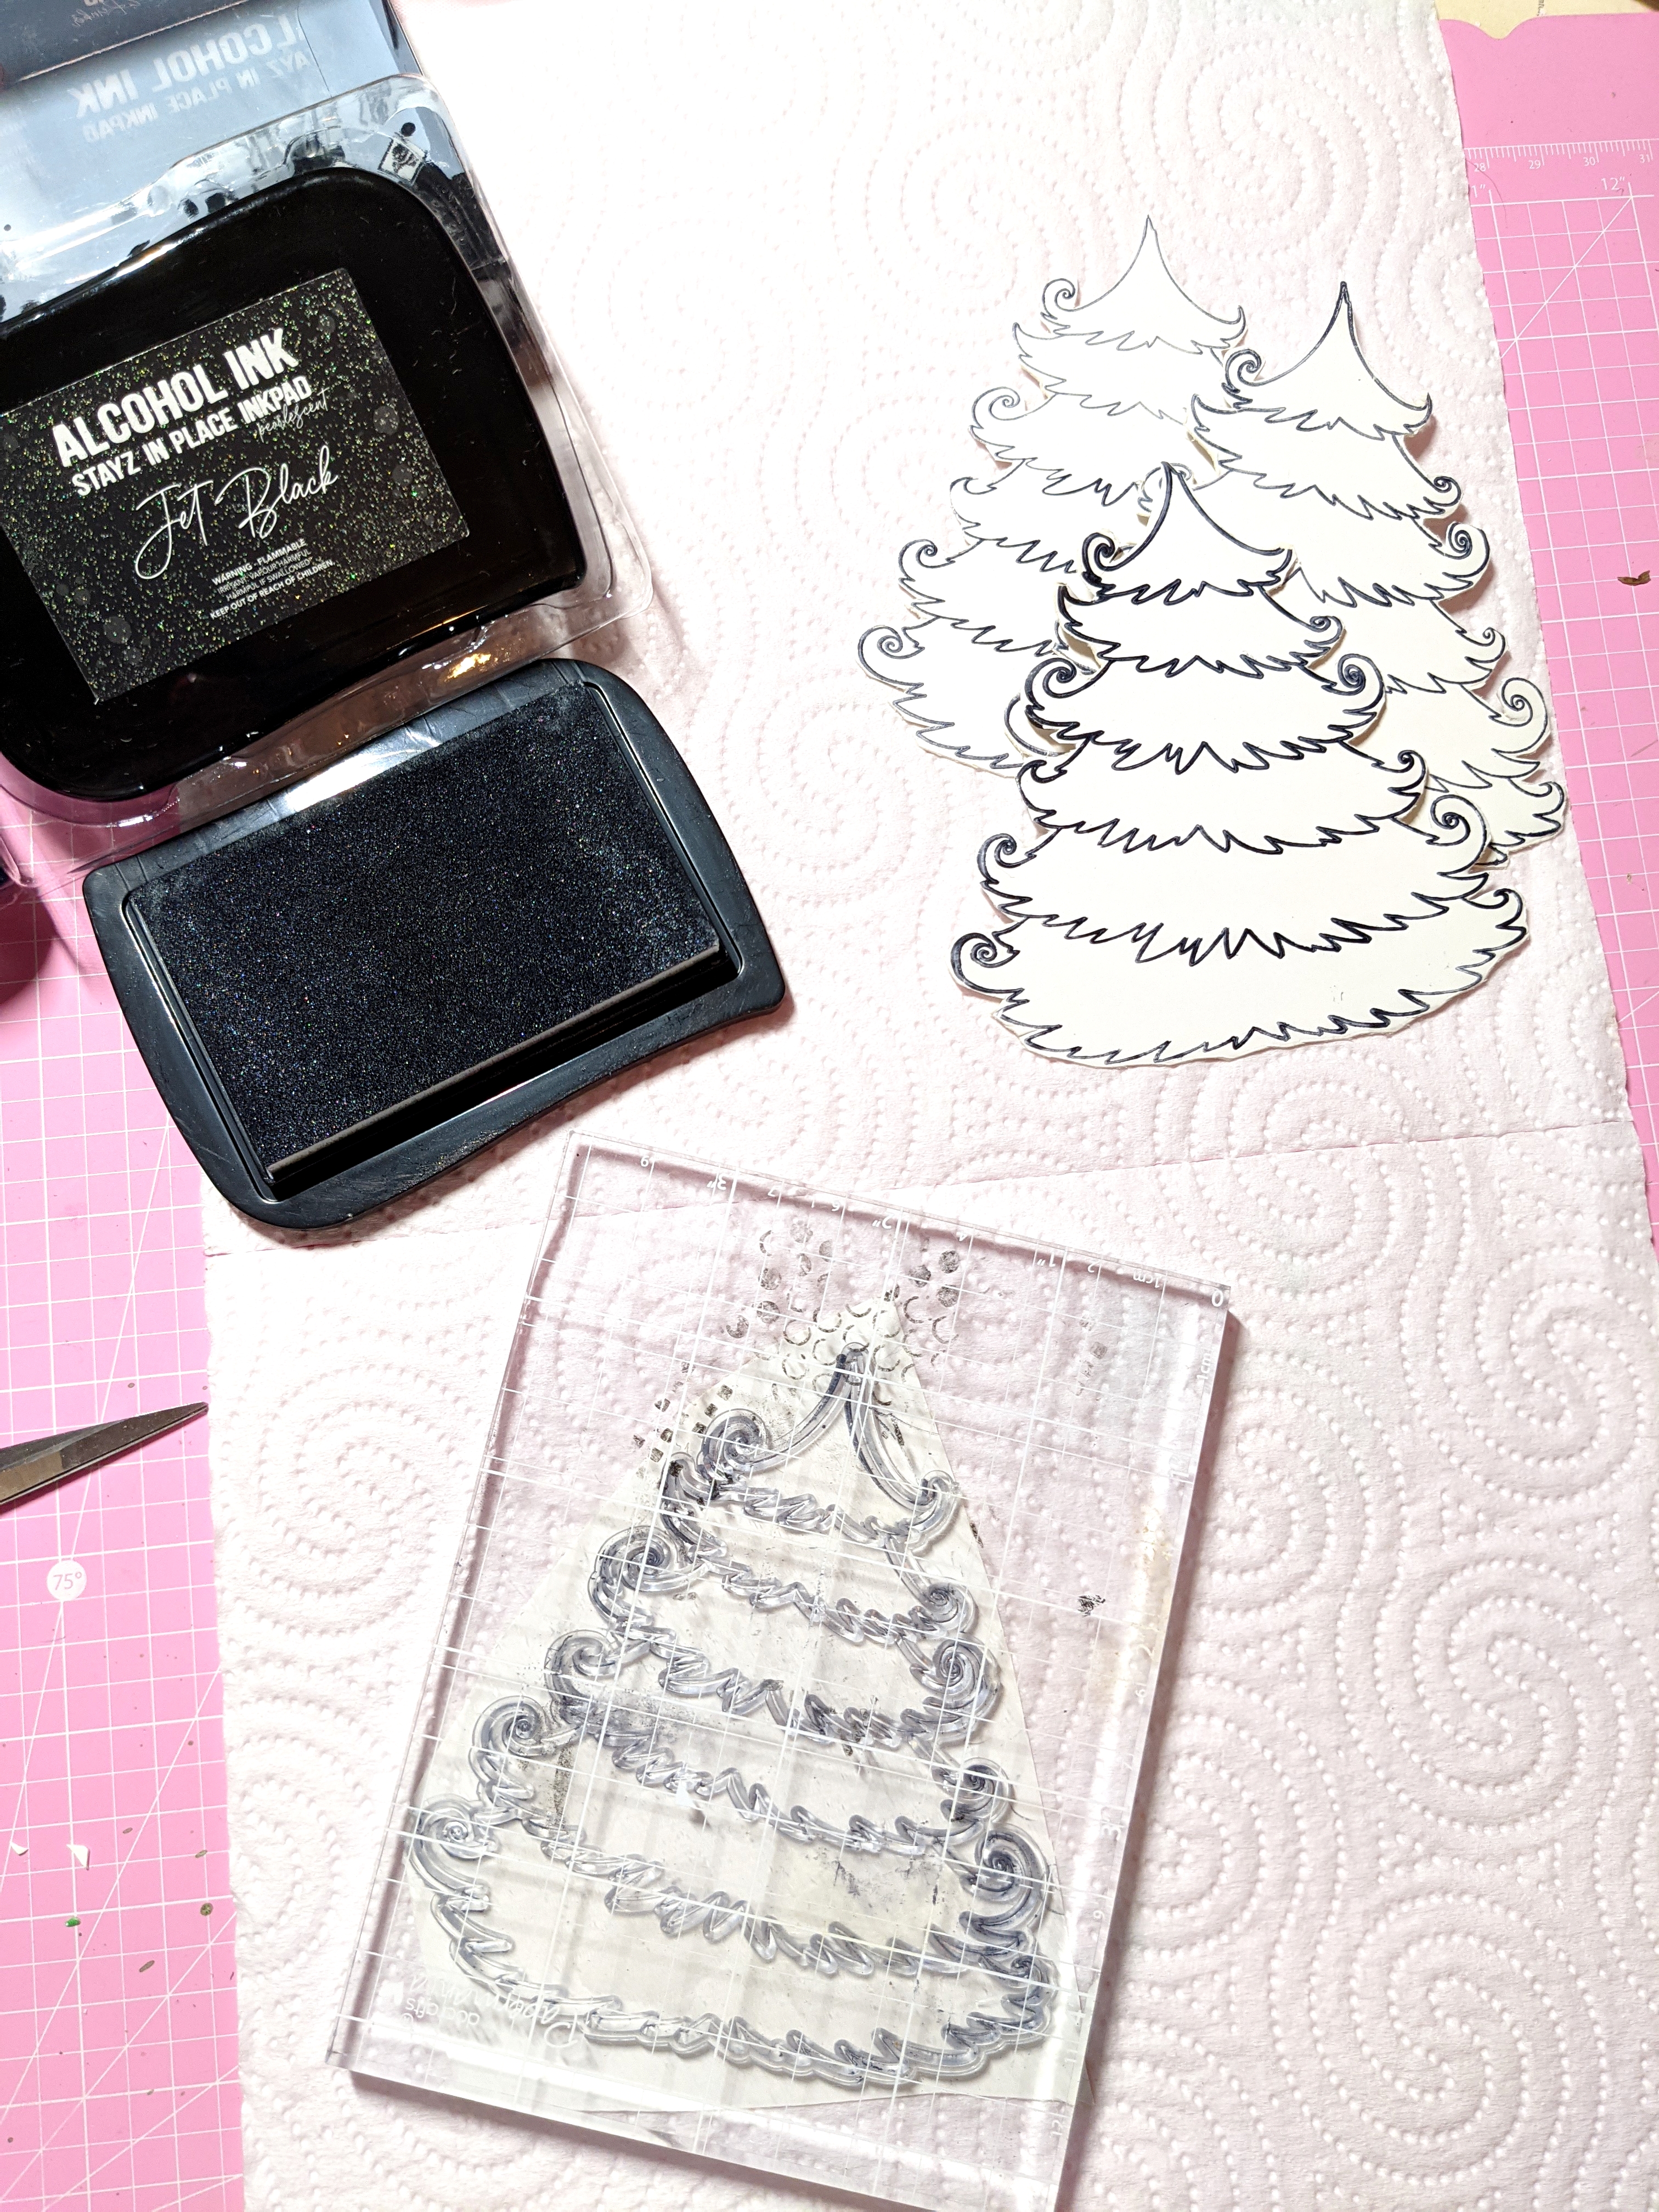
 I started out by stamping out three tree images using the Jet Black Stayz in Place Alcohol Ink Pad onto Yupo Paper


I then cut all the images out, I actually stamped and cut one extra just incase I wanted to add another layer


I then selected my Alcohol Ink colours, testing them on a scrap of Yupo Paper


I started layering my Alcohol Inks by applying the Khaki Glitter Alcohol Ink first, I then added the Champagne Metallic followed lastly by Jade Metallic, then blowing the colours around using the blower tool 


you can see the shimmer from the metallics and the sparkle from the glitter 


Once dry I them restamped the tree images using the Jet Black Stayz in Place Inkpad you could restamp using gold if you prefer but I wanted the stark contrast


I diecut Merry Christmas sentiment from Gold Mirror Board


I then layered my tree onto my base card which I had created using Mirror Board and White Glitter Card 


I hope you have enjoyed my tutorial and remember if you recreate this card don't forget to share on your socials and tag #couturecreationsaus and me #kerriegurney

Until Next Time 
Don't forget to follow Couture Creations Blog as well as on Facebook and Instagram 


Happy Creating 


#kerriegurney

Tuesday, June 9, 2020

Family Fun Double Layout | Little Birdie Crafts


Hi Everyone Kerrie back with another tutorial for Little Birdie Crafts Blog using their gorgeous Watercolor Floral Ballet Paper Collection which is a gorgeous fresh floral collection on a linen type paper. I have also used a sheet of pink paper from their Pretty in Pink Collection which is also a linen paper. This layout is a great design for when you want to scrap an occasion and get more photos in your album. You can change up the first page and instead of one larger photo pop 2 or 3 smaller ones on to tell more of your story. These photos are from way back in 2004 and are ones that weren't great or in focus so i kept putting off scrapping them but I decided to just scrap them as I love these memories of our family holiday and cameras weren't what they are now and neither were my photgraphy skills which again is all part of  our story and that is what scrapbooking is all about documenting our family memories even if out of focus.


after cutting up my patterned papers and working out their placement I added some texture using mixed media paste and bricks stencil.
*Tip make sure if you are creating a double layout make sure you use base cardstock from the same pack, as you see my shades of white are different, which thankfully doesn't matter as I have covered most of it, same often gores for patterned paper packs as they can be from a different run. I actually didn't notice until I took the photo by then I thought too late  :)


You can see I have applied the mixed media paste nice and thick and random giving that natural brick look.
I sprinkled Cyrstal Glitter over the paste while still wet to add subtle sparkle


 Snip out Primed Chipboard title and paint with Pink Ballet Chalk Paint, while wet sprinkle on Crystal glitter again to give a subtle sparkle to your title


I then layered everything onto my base pages starting with the base patterned papers and then embellishing with a mix of  fussy cut flower clusters from the Watercolour Floral Ballet fussy cut sheet, handmade flowers, die cut leaves


I finished off with some splatters using watered down chalk paint


and dry brushing Gesso onto the Handmade Flowers


You can see the sparkle on the Chipbaord title


LIttle Birdie Crafts Products Used

Watercolor Floral Ballet 12x12 Paper Collection Pack
Pretty in Pink 12x12 Paper Collection Pack
12 x12 Gold Glitter Card
Bricks Stencil
Chipboard Titles
Mixed Media Paste
 Pink Ballet Chalk Paint
Gesso
Crystal Glitter
Serenade Blush Handmade Flowers


Thanks for stopping by I hope you have enjoyed my tutorial,
please if you don't already follow Little Birdie Crafts on FacebookInstagram and of course their Blog 
 for fabulous tutorials from all the Design Team
You can purchase all Little Birdie Crafts products from your local crafting store or online HERE

 Happy Creating 


#kerriegurney #littlebirciecrafts